
DIY Herringbone Table Runner.
In the last couple of weeks, I've had two emails inquiring about the herringbone table runner that I made for our styled shoot that was...
https://iskablogs.blogspot.com/2012/09/diy-herringbone-table-runner.html

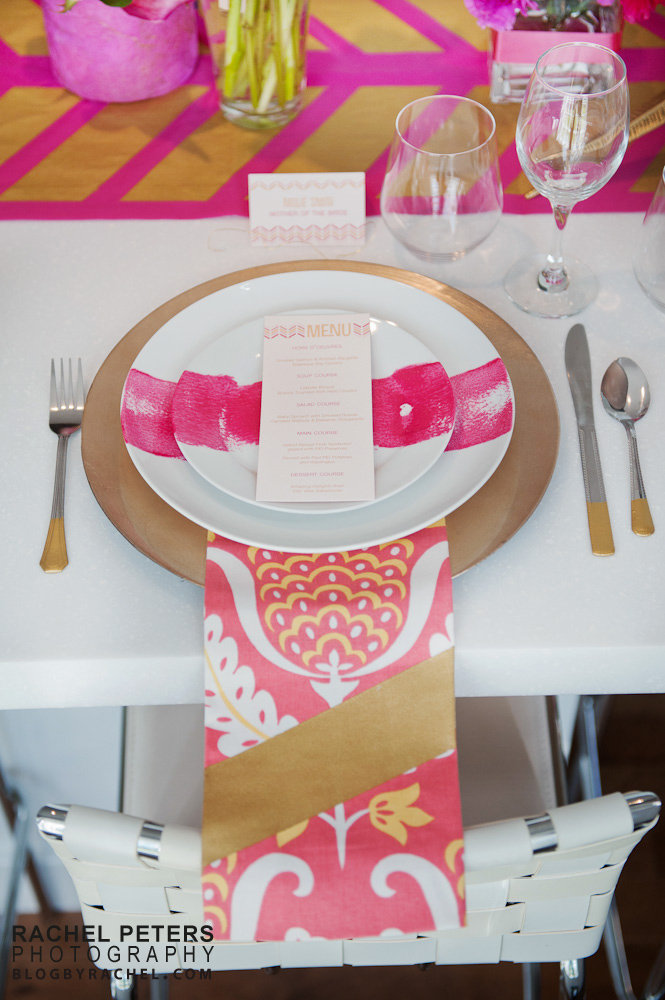
In the last couple of weeks, I've had two emails inquiring about the herringbone table runner that I made for our styled shoot that was featured on Style Me Pretty. If you follow my Facebook page, you may have spotted in on my cover photo. I decided to share a little tutorial for you all today because it was really quite simple!

At the time, I was obsessed with anything herringbone. I saw it as a fresher take on the tiresome (sorry!) chevron and was dying to try it somehow and somewhere. I'm glad it ended up on a table runner and not a big wall in my house. That's commitment but I'm telling you, I was obsessed! Anyhoo, I digress! Let's get to it!
DIY Herringbone Tutorial
First, I purchased some hot pink fabric with matched the color scheme of the wedding. I knew the dimensions of the table we were using so I planned the length accordingly. (Disclaimer.. I wouldn't recommend this but I didn't even sew the runner. I knew if was just for photos, so I simply ironed a nice flat seam on all four edges.)
Next, I taped a herringbone pattern with painters tape right on the fabric. Here are my instructions for taping:
1. Find the middle of your fabric and tape a straight line down the center. I then added another strip on either side because I wanted a thick line. I also taped a strip on each side.
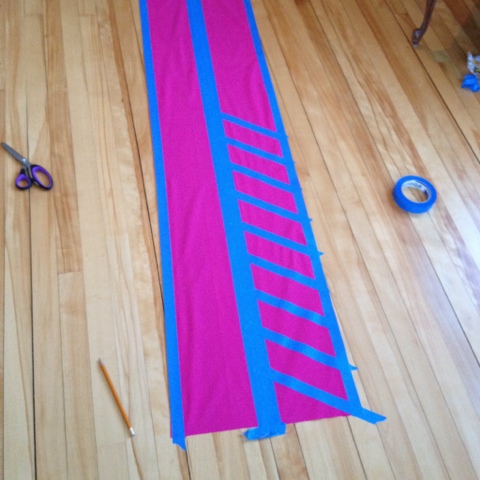
2. You should also decide how deep you would like your chevrons to be. Do you want a somewhat subtle look or a perky look? Totally a personal preference. Let's say you decide you want them 10 inches apart. Start at the top and mark off every 10 inches. Then, tape from one little mark diagonally down to the next mark. Repeat on the other side. Push down all the edges of the tape with your fingernail. Take a few minutes but you'll be glad you did!

3. Next up - painting! I did 3 coats using a gold acrylic craft paint. (Tried a foam roller first but found a brush worked much better)

4. Let it dry overnight then peel off the tape to reveal a modern, geometric pattern. Thankfully, I only had one little bleed!

So there you have it! A modern geometric pattern with a little tape and some paint. Who every said you couldn't paint fabric? It was so easy that I ended up adding a the same technique to some napkins as well!


Be sure to share your painted fabric projects with me! The possibilities are endless. So many colors, patterns, stencils to work with!
Linked up to Serenity Now Weekend Bloggy Reading Link Up.


